Showing posts with label Quilled heart. Show all posts

QUILLING VORTEX HEART TUTORIAL


Lots of love to you! Alhamdulillah, I'm writing here again today after being offline for more than a year. Feels good to be back here, creating once again even though I'm not sure if anybody here will read my post. I will still write no matter what because I want to, my heart is still here. I might have been away but deep inside I never left. 

Sometimes once has to make decisions that may not be the best for everyone. Tough decisions indeed. I'm glad I managed them well and now I can be at my happy place again, doing what I love. Honestly I have to say that I was shocked to receive so much love from friends and fellow crafters who were concerned. I can only pray for the best to those who showed me love.

I am so happy I get to make a new quilling video tutorial....something I promised to make before I went offline, please do check it out.


Rainbow heart pop up card


Hi there!
I'm blogging again today about one of the cards that I made using dies from In Love Arts Shop. I love this one especially because it has a pop up heart inside.

I've made a rainbow heart card like this previously but this one is a little different because the quilling rainbow heart has many more loops than the one I did in the tutorial. A bit more complicated and time consuming as well. I didn't really enjoyed myself making this one, LOL! It maybe my last time making it hehehe!

Anyways, I did however love doing the cross stitch! I think this pattern suits the card the best. Love stitches like that on cards. It's simple and pretty. Pretty simple to sew too.

Of course the die cut letters are the best! It was a little harder to cut that gold glittered paper because it was really thick but managed to cut it after rolling it through the die cut machine 4 to 5 times. The glitters made it difficult to cut through easily. But I really love the results. Really suits the card. I purposely glued the letters on a coloured plastic sheet so that it would look like the letters are floating on the card.

The pop up is just a simple one. I didn't want to make it too complicated. It's a small card anyways. Not much space to do a complicated pop up there. I made sure the heart pops on the left so that there's a lot of space to write wishes on the right side of the card. If you wish to learn how to make that pop up, do let me know so that I can do that tutorial for you.

If you guys are interested to purchase the dies I used for this card, do click on the links I placed below the photos of the dies. Apply the code : FSAZLINA when you make the purchase to get 15% off every purchase. Worldwide free shipping for orders over $25! Thank you so much! 


SKU: DMZH194


Congratulations on your wedding

W018

I got butterflies in my stomach and somehow it got transferred on to the card ;). I rarely put butterflies on my cards but for this one it just seems so suitable and I couldn't help but adding them along side the focal point of the card which is the heart shape paper doily that I got from WholePort. 

I've been wanting to do this type of swing card for the longest time and I'm super excited about being able to get it done in the end. It's a see-through type of swing card! hehe! Peekaboo! :D


I used the Yellow quilling paper strips from WholePort to make the quilled heart. I'm getting used to using the 5mm quilling strips....it's not that bad after all. But of course the 3mm type is my personal favourite.


Ok! Sewing on paper like this is therapy for me lately. I just love doing this technique. Not sure if I'll ever get bored doing it one day though. For now it's just bliss!! Even better when using the embroidery thread :).

I also love the lace I used to decorate on the front part of the card. I got that one from WholePort too. I'm just using up all the products I got from them. Fun playing with all the goodies. ;)


Lots of green and pink!

V054


Watch this video to see how the hearts pops up inside the card  ;)
(First time ever for me to take a video of my pop up card!! So exciting!! hehe!)


Look familiar?? Yes, this design is actually a design I made sometime ago, made it last year to be exact. But the colour combination was different when I did the HB085 birthday card. And the pop up inside was different as well. You can view it at the link --> HERE. My customer wanted me to change the colours to a combination of pink and green so that's why you see there are a lot of pinks and greens here :). And for the pop up, she was interested in something like HB039, but I didn't do exactly like that and changed the pop up to make it more suitable for this design.

It took me such a long long long time to get this card done for her. She had to wait for so many months! She is such a nice and patient customer. So grateful for that :). I'm so happy that I finally get it done and also made some bookmarks for her too, which she requested especially for her and her bf ;). You can view the bookmarks below.....it's a design I've done before...you can view it at the link here ---> BM007 , but since I ran out of dark brown paper, I had to substitute it with black instead but still I added the metallic brown paper for the engraved name behind the bookmark. So happy that she loved what I made for her ;). I'm so happy too! hehehehe!


Brown and purple

HB095


HB096

I'm not sure how many times I've done this design. So many many many times hihihihi....in so many different colours too. This time I'm doing it in two other different colours. One in brown and the other in purple. Love both cards as the paper is metallic....shines when it hits the light :).

Usually this design comes with a pop up inside but for this two I didn't make any. Just a paper inserted inside the card for writing in special wishes. It's been a while as well for me to make quilled hearts. Combining few colours in one heart. Used to love doing that a lot last year. :)

These two cards are actually for a dear aunt of mine who ordered these birthday cards for her dear sons. Hope she likes it :).

Red theme quilled butterfly and quilled hearts

BM013

Red theme quilled butterfly bookmarks with tiny quilled hearts :). A request I got from my customer who wanted me to combine a quilled butterfly and tiny quilled hearts in one bookmark. One for herself and the other for her loved one....so sweet hehe. Both bookmarks has their names engraved at the back of it as well. I cut out their names by hand. :)

These bookmarks have a different function. Not for marking books but for her to hang it in her car and  in his car as well......hang them at the top view mirror hehehe. That is why I tied the ribbons with a knot at the ends that way. Not sure if the length of the ribbon is enough though to go through the top view mirror. I  forgot to check these things out before I tied the ribbons to the bookmarks. Sigh.....hope it works out...


I love the paper I used for the back of the bookmark. It's a dark gray metallic paper. Love the way it shines when it hits the light. And it sure does have a good contrast with the red color too. Loving it! :)


Red and green teddy bears


BM012


 BM007

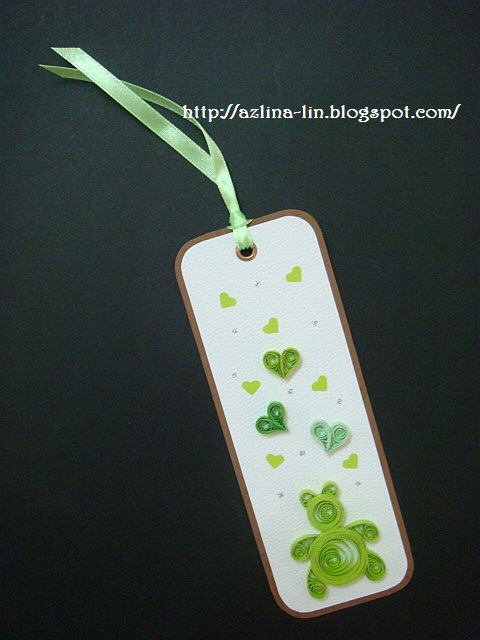
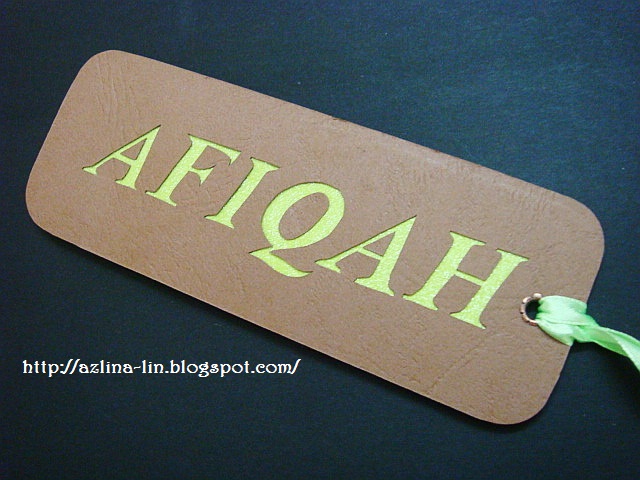
Red and green quilled heart and teddy bear bookmarks! Requested by a regular customer of mine who wanted these bookmarks to be in those colors with names hand-carved behind the bookmarks. :)

The green teddy bear is a design I've made before, so it's not something new. But the red one is new :). I uploaded photos of the green one anyways because the wordings behind the bookmark is obviously different and I just love how it looks hehee.

The size of the bookmark is standard in size but if you wish to write longer names, then the length of the bookmark would be longer otherwise it won't be able to fit in all the letters. You can view other samples of this type of bookmarks with names at the link HERE. :) 


Tool box 3


I've just finished making another batch of quilled items for my 3rd tool box yesterday. I think this will be the last tool box I'll be making because I need to concentrate on other projects in the next few months. Making these quilled items for the tool box is very very time consuming as you all know. And if I were to make another one, it will probably be for me hehe! Coz I would like one for myself as well haha! :D

It's a big relief to be able to get this tool box done and I am really in need of a holiday. I will be taking one soon next week and I'm just counting the days now. Been working non stop for two months straight and it's nice to take a long break for a while. Want to go hunt for new supplies as well. Visit new craft stores and feast my eyes with beautiful things hehe! Do fun stuff with friends too! :D
So I will be away till 4th of July and will resume back to work on the 5th. Have a good weekend everyone! ;)

Turquoise, lime green and orange teddy bears

BM006


BM007


BM008


Mini quilled teddy bears in turquoise, lime green and orange color! Yup! Requests from a new customer who wanted them in his favourite color and also in his sister's favourite colors too.

I was also requested to make some quilled alphabets of their names on the bookmark itself but I was a bit reluctant to do it since the bookmark is quite small unlike a card that has more space on it. Furthermore, my quilling skills in making those small alphabets are not up to the standard yet! haha! So I suggested to him that I do those names in the way I'm good at which is by carving out the alphabets and lining them with some thin fabric and color paper. I love how it all turned out in the end. :)

You can view some carving techniques I've done before on bookmarks at the links HERE, HERE and HERE :).

This is the first time I decorated both sides of the bookmark. Normally I would just decorate them on one side only.....but since there isn't much space for the design and the name, so I thought this would be a much better solution to combine both on one bookmark. I'm so glad that my customer loved them so much! :) 


Featured Post

How to make two tone tear drop shape quilling flowers

We are coming close to mid February and I'm blogging about something that I did last January! LOL! It's been a month sin...