Showing posts with label Craft tips. Show all posts

Tips to cut paper with intricate dies!


Hello everyone!
I just wanted to share a quick tip today for those who have issues with cutting paper with intricate dies that has fine details on them. I got a clever tip from a friend on Instagram, IG: CMAYATO this morning, on how to make it easier to cut with them and she advised me to use wax paper! I was like, wow! I didn't know that before! 

So immediately after that I tried it with the baking paper I had in my house to see if it works. I didn't have wax paper at home, all I had was this baking paper. Baking paper has some wax too although not as much as wax paper though.  It really did work!! Awesome!! I was really struggling with these dies and I didn't know that there are ways to help make it easier.

The best part about using wax paper for this is that you can use any weight of paper to cut with those intricate dies!! So it's not necessary to use just thick paper! And you don't have to run the dies through the die cutting machine so many times! What a great relief for me because now I can use  all my 100 - 120gsm paper for die cutting. I have a lot of that type of paper with patterns. It would be a shame if I can't use the intricate dies with those papers. Yay!!!

I also found out another tip from someone on YouTube, Yolanda McCurdy who commented at my recent YouTube post. She advised me to buy the Sizzix Precision Base Plate! Now that's a cool tool to have!! That will make die cutting with intricate dies sooooo much easier!! That costs a lot though to buy in Malaysia but it's worth the money since I'll be using it a lot for my handmade cards.

Anyways, I'm so happy that these ladies helped me out today! I really needed these tips to help me with my work. Alhamdulillah, I'm grateful and thankful to God to have such beautiful souls out there who are willing to help people in need like me. May God bless them always! :)


Alternatives for quilling comb


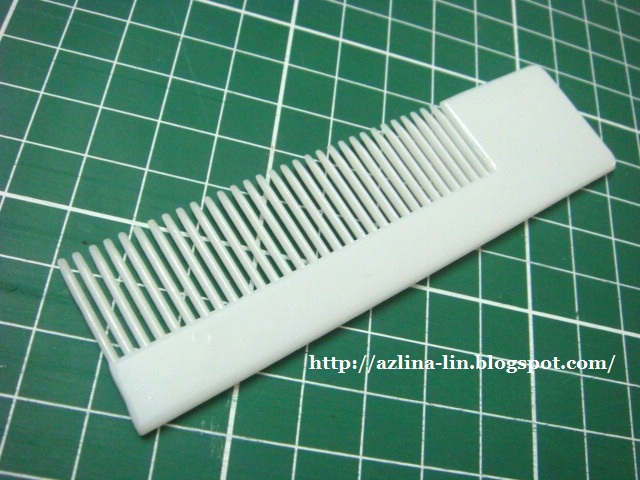
A lot of my readers have been asking me about the quilling comb. Many have expressed their interest in purchasing the product from me but unfortunately I no longer sell the product because I think that we can use an alternative tool to do the combing technique just by using a hair comb. It's cheaper! ;)

Below you can see the various types of hair comb that I am currently using for the combing technique. I used each of them for making different types of flowers or leaves. You can turn the hair comb into a quilling comb just by cutting off the end part of the comb using a small DIY hand saw. See below how I've changed the hair combs into quilling combs and view in the video the basics of how you can use the altered hair combs for the combing technique. Do watch till the end of the video because I'll be showing you how to make the  basic husking flower at the end of it! So do be patient and watch the whole video ya! Hehe! TQ!


I would say that this lice hair comb is my favourite! It's very easy to hold when doing the combing technique and I can do cascading loops with it and also the tiny loops petals as well with it. Love the small pins it has and the gap between the pins are really close together. But if I wish to make the loops look further apart from each other, I just skip a few pins to get bigger loops. You can only use one side of the comb. The other side has pins that are just too small and the gaps are too narrow for the quilling paper to go through. You can use this hair comb to make the cascading loop flower, the tiny loops flower and also the husking flower.


This hair comb is "ok la" for me hihihihi. Not my personal favourite but since it's bigger in size, it's quite comfortable to hold. The pins are quite big, thus producing bigger loops that sometimes are not to my liking.  This hair comb is not suitable for making the tiny loops flower though.  I've tested it and it didn't look that nice. But it's ok for making the cascading loops flower and husking flower :).


Tiny loops flower - Part 2


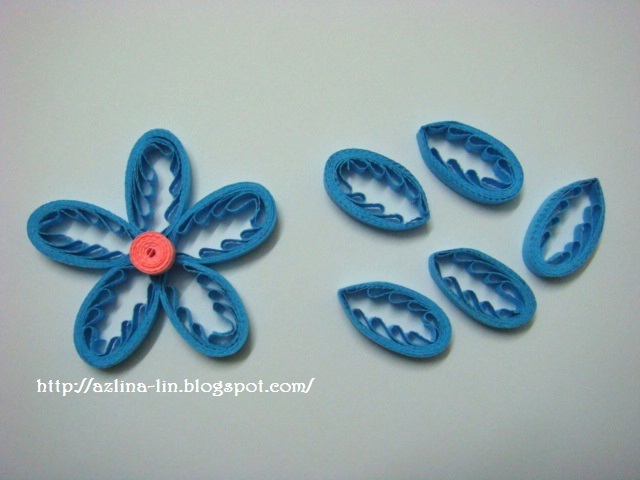
This is another version of the tiny loops flower, but it is made using the quilling comb. As you can see, when using a quilling comb, the flower becomes a bit bigger than the flower made using a  hair comb. And the tiny loops inside it becomes a bit bigger as well. So, in other words, the bigger the gap between each pin, the bigger the loops will be.

Here's a video tutorial I made to show you how I made each petal of the tiny loops flower using the quilling comb. :) Check it out!


As you can see from the video, I used only 1 strip of  quilling paper to make the tiny loops petal and then wrapped around it half a strip of the quilling paper to secure the shape of the petal.

Once all the petals are made, you can join them together to form a flower. The quilled tight coil is just a sample of how you can decorate the flower to make it look more complete. But of course there are many other ways to decorate the middle part of the flower to make it look beautiful. I'm just showing the simple basics of how you can decorate it :).


The above photo shows how you can make the petal look a little different by pinching both ends of the petal to get the marquise shape petal. If you compare the shape of this petal with the petal made using the hair comb, this petal is a lot slimmer than the one made using the hair comb right? It looks a bit longer and slimmer to me :). So each one is special in it's own way. The quilling comb makes a different effect and so does the hair comb. Up to us to choose which we prefer the best :). So for those who owns a quilling comb, you can also give this technique a try! All the best!!


Slotted paper quilling tool


Interested in a slotted paper quilling tool? Well, I have good news for everyone out there who are fans of quilling! I'm  now selling this quilling tool! :) It's about 12cm in length, with a brass needle slot and a plastic blue marble like pattern handle.

Honestly, I really love this quilling tool.!! It's definitely my favourite quilling tool now amongst my collection of quilling tools. It's so comfortable to use because of the long plastic handle and I really love the slotted part that is quite long in length compared to the one I bought when I first started to learn how to quill. It just makes quilling big coils of quilling paper a lot easier, in my personal opinion. The tight gap of the slot makes it easy for the quilling paper to stick and coil around it. No slips at all. Love it! :) I even decorated the quilling tool with a silver lining dark blue ribbon around the handle just to make it look a little prettier hehehe.

Below is a video tutorial that I made on how I use this slotted quilling tool. Do check it out ;)


So if you are interested to get this lovely quilling tool, do email me for details on how to purchase them at my email address: inaabdul_21@yahoo.com


Storage ideas


During my trip to KL recently, I was asked by my fellow craft friends about how I store my craft materials especially my ribbons, buttons, beads, sequins etc etc. They are even interested to see what my studio looks like hehe!  Honestly I'm quite embarrassed to post photos of my studio here in my blog for all to see. Especially since it's just an old room that looks more like a store room to me! hehe! I love calling it my "studio" because it's where I work. Nothing fancy about it at all. It's simple and full of stuff!! You can even find lots of old junks in here as well! haha! :D

So I won't be showing you the full view of my studio yet! ha! Sorry! Instead I'll just share with you today some tips on how I store my craft materials.......IN A CHEAP WAY! LOL! :D


The photo you see above is actually my collection of buttons. I keep them all in plastic containers. Do the plastic containers look familiar to you?? Yes, you guessed it right! It's a yogurt container! Well, most of them are!  haha! I recycled them to be used as containers to keep all my collection of buttons. I didn't have enough money to buy really fancy compartments for buttons so I've been keeping all my buttons in these containers for years now. I marked the containers with markers so that I know which color buttons are in which containers. This way, I won't get confused when trying to find the right color buttons. :)


OK! OK!  PLEASE DON'T LAUGH YA! ;) This is how I store all my beads and sequins. Some I keep in yogurt containers, some in cupcake containers, some in hotel's shampoo and conditioner containers, some in medicine containers, some in chocolate containers and the list goes on and on. As long as the containers are plastic or made of see through glass, I'll use them to keep my beads and sequins in them. :P The truth is finally out! hahahah! :D


This is a plastic container where I use to keep all my ribbons! Look familiar?? Yup, it's the same plastic container you get whenever you buy cookies! haha! I always keep them whenever I buy cookies, so that I can use them to store my ribbons. I have so many ribbons in my collection and it's difficult to keep them neatly in boxes or drawers, so this plastic container helps keep them arranged neatly inside my drawer. 


See how neatly they are arranged in my drawer? I can even stack more ribbons on top of it if I buy more ribbons in future, so this technique really saves space :). I don't like to keep my ribbons outside because I don't want them to get dusty over time. So to keep them in good condition, I prefer to store them inside closed drawers such as this. 

You can also use this plastic container to keep all your small craft punch and your rubber stamps too. :) If you don't have drawers, you can always buy those affordable clear, see through plastic containers or Tupperwares to keep your small craft items. It's cheap, and you can stack them on top of each other to save space. :) 

So you see.....I don't have fancy storage boxes or fancy containers to keep my craft materials. I just use whatever I can find at home to store them. As long as they are kept nicely and neatly in my studio, I'm fine with it hehe! I guess I'm being practical since I don't have much to spend.  What is important is what I can produce with what I have. ;)


Needle quilling tool


I own two types of quilling tools which I bought early this year. But I have only been using one of them (the slotted quilling tool - silver in color)  because it's much more easier to handle. I even made my own quilling tool using a bamboo skewer which I have been using for almost all of my quilling projects so far because it's so comfortable to hold and super easy to roll the strips of paper with it.

I've never tried using the needle tool like the one you see above (the one with the wooden handle), because I never had the patience to try it and didn't quite get it how to use it even though I've seen the video tutorials. All this time I kept thinking that it's too difficult to use. So I never used it for any of my projects until the day I went to the quilling get together when I saw with my own eyes how the other quillers used it. It looks so easy!

This is how I use my needle quilling tool. I made a video of how I use my needle quilling tool. Different people may have different styles of using it, but this is how I do it ;). Do check it out. :)


Once I've tried it, I could see the difference in the coils I've made. The paper coils are so much neater than the coils I made using the slotted quilling tool. I noticed that if I use the slotted quilling tool, there will be a  small crease in the center of the coil because the end of the paper strip is inserted at the slot thus creating a small crease there. If I use a needle quilling tool, there won't be any creases at all. I really love the effect I get using the needle quilling tool. It's especially wonderful when you are making quilled circles. The circles looks so much neater.

I feel that each quilling tool can be used for different types of quilling shapes. For me, if I want to make quilled circles from now onwards, I would only use the needle quilling tool as the quilled circles will look so much more neater and prettier. But for making quilled roses, the slotted quilling tools is much more suitable to use to roll the cut out shapes. It all depends also on which quilling tool you are comfortable with.  As for me, these are my preference.

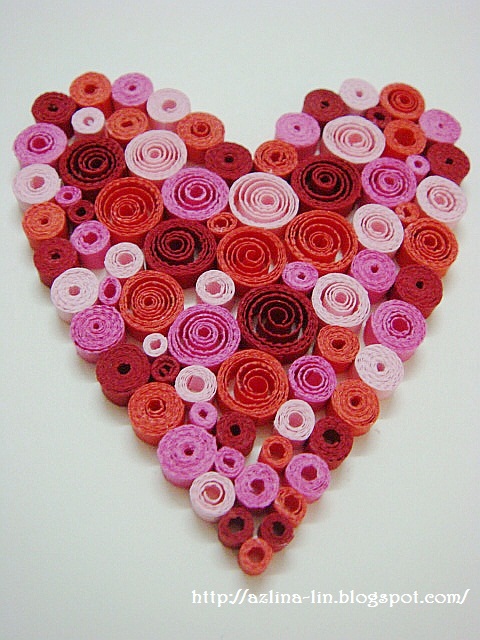
You can see the differences of the quilled circles from the photos of the quilled hearts I made here. Can you spot the differences?? ;)

Quilled circles made using the needle quilling tool


Quilled circles made using the slotted quilling tool (made from bamboo skewer)


Featured Post

How to make two tone tear drop shape quilling flowers

We are coming close to mid February and I'm blogging about something that I did last January! LOL! It's been a month sin...