Showing posts with label Quilling comb. Show all posts

How to make multicoloured square vortex - Quilling tutorial


Hello everyone!
I know many of you are still having problems quilling multicoloured square vortex shapes. So did I years ago! LOL! On a good day I could make lots of them, but there are times when it really tests my patience and hurts my fingers! haha!

I have to say that I thought of a new way of making the multicoloured square vortex shapes coincidentally as I was doing quilling. Been busy with other stuff lately that I have stopped quilling for  a few weeks. But when I started quilling again, the idea came to mind, alhamdulillah. Such a blessing because I love the multicoloured square vortex shapes a lot. But making them can be a burden to me and to some people and I'm so happy that it's no more the case now. I can now make as many of them as I like. I'm super happy about that. 

In the video tutorial that I made back in 2016, I made the multicoloured square vortex shapes using 3mm shredded papers and I used the slotted quilling tool. In my new video tutorial, I used clean cut 5mm quilling paper that I cut by hand piece by piece and I used a flea comb instead as a tool. So it's totally different from what I did years ago. 

A lot of people have been asking me about the type of paper I used to make the multicoloured square vortex. Well, I have stated in the video tutorial the type of paper I used and most of the time it has always been A4 80gsm printing paper. I don't buy standard quilling papers for my quilling craft. I prefer to make them myself. Either I cut them piece by piece or use the manual paper shredder or the pasta machine. 

Please watch the new video and see how easy it is to make the square vortex shapes. You'll be surprised! 


Quilling butterfly with a quilling comb


Back in 2011, when I first got my quilling comb I did made some quilling butterflies with it. Although it was nothing much, just some simple ones, I did remember how much fun I had making them.

When I looked back at the quilling butterflies I made with the quilling comb, I couldn't even remember at first how to make it again because it was so long ago since I last made one. I thought to myself here is something that I have to record so that I won't forget how it's done. So once I figured it out, I immediately made a video tutorial of it. I don't mind sharing it with everyone. I'm sure a lot of people would like to try to make one too.


In the video tutorial, I showed how to make a quilling butterfly using a standard quilling comb. But you can also use other types of combs as long as they come with long pins. I also mentioned about the measurements but you can always change the measurements and make the butterfly according to the size that you like. Like for instance what I've shown in the photo above. I used a stainless steel comb and marked the numbers beside the pins. And instead of doing 6 loops for the top wings, I made 5 loops instead. Just by doing so, it immediately changed the whole look of the wings. So, it's all up to you! :)

You can even make the butterflies very very small, just by cutting the paper strips yourself using a craft knife like I've done at the photo above. I used the other side of the stainless steel comb where the gap of the pins are narrower. As a result when you comb the paper, you will get the butterflies in smaller sizes. I just love them this way. So small and cute! :)

Here is the video tutorial for your view. I hope you will spend some time viewing it and learn something new.


Double star loop flower tutorial


This is another one of the quilled flowers design that I made at the same time I was making the Teary loop flowers about 2 weeks ago I've done a flower that is similar to this one before as you can see at the link HERE. The only difference is in the way I arranged the amount of cascading loops to form the flower. Even the shape of the flower was made differently from this one. Honestly I prefer this latest design compared to the one I made back in 2011. ;)

I took some time off today to make this video tutorial. Had to shoot the video a few times because there were so many disturbances as I was making it. In the end it was finally done and I had to be happy with it even though it was not exactly how I want it to be. I was too tired to make a new one ehehehehe. Hope everyone find the video tutorial easy to understand and find the steps easy to follow too. Enjoy the video and happy quilling combing! :)

Teary loops flower tutorial


I made these teary loops flowers recently but didn't have the time to make a tutorial of it at the time. Finally I had some time off today to make one and share with everyone. It's a very simple quilled flower made using a hair comb and some colourful quilling paper.

You can view the tutorial at the video below. Hope it is easy for everyone to understand and follow. Thanks for taking the time to watch and happy quilling everyone! ;)

3 tone flower bookmark


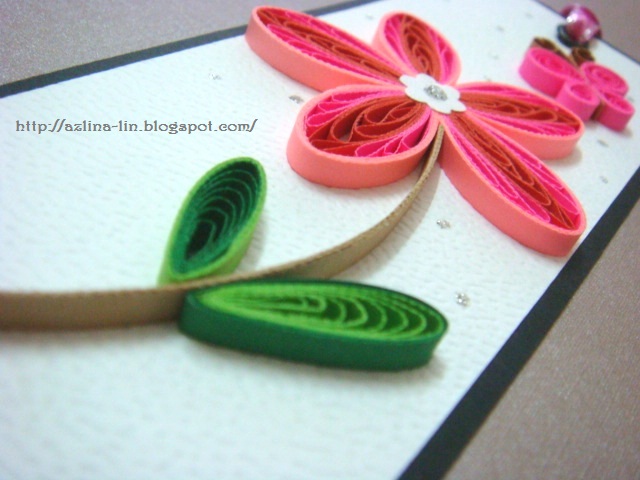
A simple bookmark made for my customer.........simple and sweet ;) Focusing more on the flower itself.....rather than on other things on the bookmark. So the flower is the first thing you would look at when you look at the bookmark.

I used the quilling comb technique for the leaves and flower.....can't help but be obsessed with that technique these days :).


Two tone cascading loops flower tutorial


In my previous post, I made a tutorial on how to make cascading loops flower just by using one color  of quilling paper, but in this post, I am showing you in the video how to make the same type of flower by using two different colours of quilling paper. One colour is sky blue and the other colour is dark blue.

I prefer to use contrasting colors to make the cascading loops so that I will be able to see a clear difference between the two colours after the petal is formed. In this tutorial, I am using a quilling comb instead of a hair comb because the quilling comb is much easier to use for this technique compared to my hair comb. To start making it, all you have to do is just glue the two quilling strips together at one end and then you can start making the loops with the quilling comb. 

Do check out the video tutorial below on how to start making this two tone cascading loops flower :). 


After making a few cascading loops, you can start assembling them to form the flowers below. :)


This is a simple example of a cascading loop flower


This is an example of a cascading loop flower that is twisted at the top end of the loop.


This is an example of a twisted cascading loop flower. I used a slotted quilling tool to twist each loop inside the petal. I start twisting one loop at a time, one to the left and one to the right, from the bottom loop till the top loop.

Hope you will be able to understand the tutorial and make these flowers yourself. All the best!! ;)


Cascading loops tutorial


There's so many things you can do with this cascading loops technique. You can make flowers with it, you can make leaves and many more. Here I'm just showing you the basics of how to make cascading loops flower. 

I've made a video of how to make each cascading loops petal for you to use to make flowers with. It's very easy to do. You can use a quilling comb or a hair comb. Do check out the video below.


The above photo show the different sizes of the cascading loops that you can make depending on the length of the quilling strip. The longer the quilling strip, the longer set of cascading loops you will be able to make. :) Hope this tutorial helps give you a better understanding of how to make the cascading loops flower. :) All the best!! :)


Tiny loops flower - Part 2


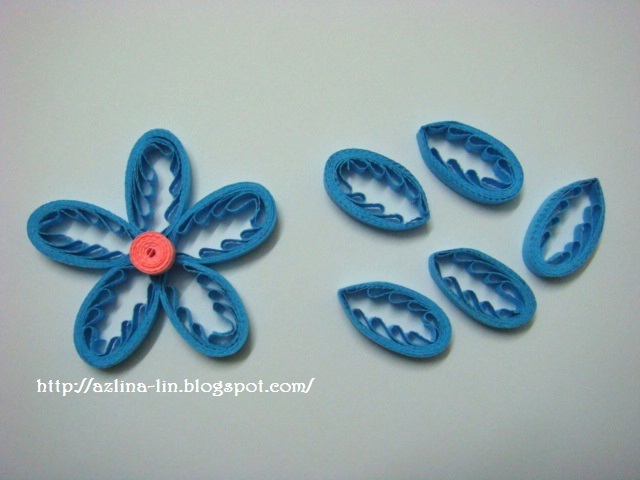
This is another version of the tiny loops flower, but it is made using the quilling comb. As you can see, when using a quilling comb, the flower becomes a bit bigger than the flower made using a  hair comb. And the tiny loops inside it becomes a bit bigger as well. So, in other words, the bigger the gap between each pin, the bigger the loops will be.

Here's a video tutorial I made to show you how I made each petal of the tiny loops flower using the quilling comb. :) Check it out!


As you can see from the video, I used only 1 strip of  quilling paper to make the tiny loops petal and then wrapped around it half a strip of the quilling paper to secure the shape of the petal.

Once all the petals are made, you can join them together to form a flower. The quilled tight coil is just a sample of how you can decorate the flower to make it look more complete. But of course there are many other ways to decorate the middle part of the flower to make it look beautiful. I'm just showing the simple basics of how you can decorate it :).


The above photo shows how you can make the petal look a little different by pinching both ends of the petal to get the marquise shape petal. If you compare the shape of this petal with the petal made using the hair comb, this petal is a lot slimmer than the one made using the hair comb right? It looks a bit longer and slimmer to me :). So each one is special in it's own way. The quilling comb makes a different effect and so does the hair comb. Up to us to choose which we prefer the best :). So for those who owns a quilling comb, you can also give this technique a try! All the best!!


A flower within a flower


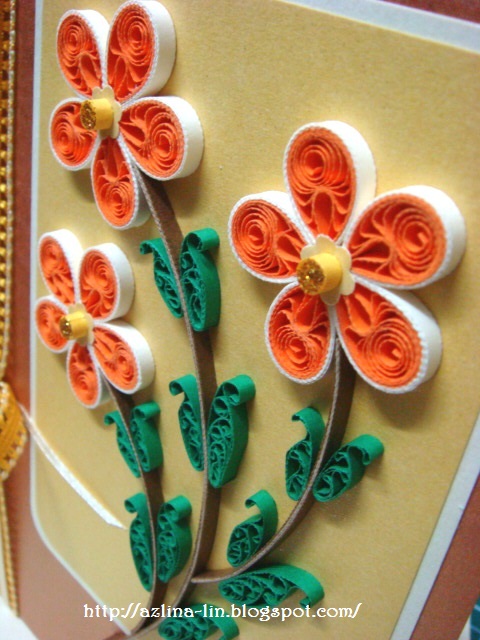
I've been enjoying making quilled flowers pretty much lately, making lots and lots of them without any reasons...I just love making them during my spare time. Just yesterday I thought of making these flowers and I don't know what to call it but I love making it! hihi! I got the idea of doing this type of flower after I tried my hand at making the beehive flower recently. You see, instead of inserting the twisted strip of paper inside the petal, I decided to insert a quilled teardrop inside it. Super easy! Perhaps there are other quilling designers out there who have done this kind of design before, I'm not really sure but this is something I thought of when making those beehive flowers. I just wanted to insert whatever I can inside the flower and the easiest for me to do at the time was to insert the quilled teardrop :).

You can insert a quilled marquis or a tight quilled coil or a loose quilled coil or whatever you think is nice inside the petal. The other difference is that I made the petal extra thick compared to the beehive petal. You can see the difference in thickness and in size as well. These flowers are a lot less smaller than the beehive flowers I made.

The flower kinda looks like there is a flower within a flower hihihi. Noticed that? I love it. I made the petals using the quilling comb. This way I can decide what size I wish to make for the petals. You can see the difference in size for the two flowers I made at the photo at the top. Those who own a quilling comb can give this technique a try. Just try it, it's super easy! ;) 

Shades of pink

HB094

Pink, pink pink everywhere......different shades of pink on one card. But one of the flowers here, the colour looks like peach, when actually it's cyber pink... lighting problem :(. I'm experimenting with another type of leaf pattern that I've tried to turn into flowers. It's similar to the flowers I made yesterday but has a slight twist to it. 

Remember the quilling blog hop I did early this month? Have a look at the link HERE. Look at the leaves. It's the same technique I used for the petals of this flower. The only difference is that I squeeze the middle part of the petal close together so that it looks like a petal. It can look like a leaf as well, if you use green colour quilling strips :). 

Basically, there are a lot of quilled patterns out there that we often use to make leaves but we can also use them for making flowers. All we have to do is just change the colours.....colours that are suitable for flowers. This is just the basic pattern, but I know there are a lot more that we can do with it to make it different. All up to our creativity :).

This flower is made using the combing technique. And like the recent Christmas flower, I used the flat hair comb to make this flower too. All because I love the small loops I get when using the hair comb. But of course you can also use the quilling comb to make these flowers too. How I made these flowers is just like the flowers I made for the Christmas card. Same technique except the part when I want to fold it in half, I fold it the other way around. Kinda complicated to explain it here. But I will make a tutorial about how to do it one day. It's difficult to take photos of it while quilling it though that's why I haven't made it yet. Must get someone to take photos of it for me while I'm combing the quilling strips hihihihi. :D


I also tried to do the Royal flower using the same flower from the card above. I just took the slotted tool and twisted the loops inside each petal and this is how it turned out. Not as nice as the original Royal flower though. I still prefer the original one that looks soooooo beautiful. You can make the Royal flower using the husking technique. That is another quilling technique that I have yet to try. I must try it someday! hihi! You can see the tutorial on how to make the Royal flower at Simple Ryhme's blog link HERE. :)

Christmas flowers

CD007 (NOT FOR SALE)

At first I wanted to do the Christmas flowers (Poinsettia) for my Christmas cards this year but the flowers I made ended up looking like this in the end haha! Doesn't look much like the Poinsettia at all :D. 

I have seen so many card designers using this technique to make quilled leaves. Have a look at Suganthi's blog HERE and Anastasia's blog HERE for more photos of this type of quilling technique that they used to make quilled leaves. They are all so beautiful! 

But instead of making leaves with this technique, I used it to make flowers instead. I love how it looks :). I used a small flat hair comb to make each petal for the flowers. You can also use a quilling comb for this technique. If you use a hair comb, the loops will be smaller in size compared to the quilling comb. I guess it depends on the size of the gaps between each teeth of the comb and also the size of the teeth as well. The smaller the gap or teeth, the smaller the loops will be. You can view how to make these flowers at the video tutorial below:


I love the ribbon as well. If I'm not mistaken I bought the ribbon about 4 or 5 years ago.....way back when I was staying in KL. Didn't buy a lot of it.....just one meter coz it was pretty expensive....couldn't afford to buy a lot of it at the time. But I decided to use it today for this card coz it's for someone special. I made this card for a special friend of mine. In fact I'll be making another one soon for another special person in my heart. These two ladies have been supporting me and motivating me in my love for card making all these years and I thought of making this card for them this Christmas. Thinking of making a pop up inside the card as well..hope to be able to get it done on time and posted. Don't want it to arrive to them so late. ;)


Twisted blue flowers


Played with my quilling comb again last night! hihi! And I made these twisted blue flowers as a result ;D. Remember the previous post where I made the leaves for the Malaysian flower using the quilling comb? Well, I used the same technique for these flowers. The only difference is that I used two different colours in one petal. One dark blue and the other is sky blue :). I just had to try make flowers with this technique. Just had to! haha! I just wanted to see what it looks like as flowers. :)

This card is was not meant for anything in particular.....just playing and it's suitable for any occasion. Will think of what else I can add on later to make it complete. Some wordings or pop up inside. Not sure yet. ;)

I made a video on how you can make the two tone cascading loops flower. Once you know how to make it, you can twist the loops inside it. Do check it out :).


Malaysian flower


Malaysian flower.......yes, that's what it's called :). This quilled flower is originally a creation of Miss Solehah Muhammad, founder of My Quilling Soul. You can view her tutorial on how she makes the Malaysian Flower at the link HERE. Ever since she created this design, so many card designers out there have tried their hand at making this special quilled flower. I myself have never tried making them until a couple of days ago when I had the urge to do so after seeing a friend of mine's Malaysian flower on Facebook :). I just had to try it once and for all! And now I'm addicted to it! LOL! :D

I've always had the impression that it will never turn out nice if I were to use shredded paper. Because all this time I've seen a lot of this Malaysian flower made by other card designers using clean cut quilling paper and they look so beautiful. The quilled design inside each petal can be seen so clearly when using the clean cut quilling paper. So since I myself love using the shredded type that has a lot of rough edges, I thought perhaps there was no point for me to try making them using the shredded paper as I thought it wouldn't look as nice. But after trying it out, I find that it doesn't look that bad after all hihihi. The quilled design inside each petal can be seen quite clearly if done the right way. :)

This is the first time as well for me to make the quilled leaves like that. I used the quilling comb to make  a few cascading loops of different sizes and then, with a slotted quilling tool, I twisted each loop inside each leaf, to the left and to the right :). Pretty easy! Love how it looks! hihi! 

Again I made the layout of this card similar like the card I made previously. I just changed the positions of the frame that's all hihihi! So simple! :D

Here's how I did it the Malaysian flower......first of all, for each petal, I used a shredded paper strip that is 29.7cm in length and and 0.35cm wide and about 80gsm in thickness. I personally prefer to use this type of shredded paper as it's easier for me to form the shape of the petal if it's not that thick. Although a lot of people have used thicker quilling strips for this, but since this is my first time trying it, I thought I should just try the 80gsm instead. Feel free to use any type of quilling strips that you are comfortable with :).

Do check out below the video tutorial I made and also step by step photos on how to make this quilled Malaysian flower ;).


At first I used the circle template as a guide for me to get the exact same shape of coils....but in the end, I just quilled each paper strip and then I let them loose on the cutting board like the photo above. 


Then I gently lift one of the quilled circle with my fingers and like the photo above, I used a bamboo skewer and pressed gently the quilled circle to fold it in half to form the shape of the petal. After that I glued the end of the strip. Then I wrapped a few rounds of the beige coloured shredded paper strip around each of the orange petal quilled shape like the photo you see below. Have fun making your own Malaysian flower!!  :)


Bright and sweet coloured flowers


I've been playing with the quilling comb a lot lately and been experimenting on new flower designs. Been thinking of what other designs I can do with the quilling comb and I thought of doing something like the above. It's actually a cascading loop technique that I used to make the petals. For one petal, I glued 3 loops together. So, there's quite a few loops to glue together in order to get just one flower. I used 2 different colour quilling strips for the flower. One cyber pink and the other is fluorescent pink. As you can see, I used shredded strips of paper, that's why the flower has those rough edges. I still haven't thought of getting those clean cut ones. Perhaps one day I will but for now, I still enjoy using the shredded type.

As you can see, I seem to love making layouts for my cards this way lately. Perhaps because it's simple and easy to do hihi! No other reason. :D The plain white metallic background highlights the flower designs and puts them in a frame. So the eyes are focused on just that particular part of the card. I was thinking of doing more to it but not just yet. Just enjoy making the flowers and leaves first and think of the rest later ;).

Featured Post

How to make two tone tear drop shape quilling flowers

We are coming close to mid February and I'm blogging about something that I did last January! LOL! It's been a month sin...