GIVEAWAY: FREE Crochet face mask extenders


Hello everyone!

It's hard to believe that the year 2020 is coming to an end very very soon. I can't believe tomorrow is already the new year, yikes!! Time sure flies fast nowadays! I'm still in the midst of cleaning up my craft room and I found a variety of yarns....I mean a whole lot of them really. I must have been so obsessed with knitting a few years ago that I went and bought a lot of yarns to knit. Unfortunately I never got the chance to knit a lot because I was also busy with quilling and making handmade cards at the time. I can only do so much at a time. With my health situation I move really slow you know. Haha! 

Some of the yarns that I bought were meant to be used as decorations on my handmade cards. That's why there's a lot of them still available because I had big plans to use them on my handmade cards. But I haven't made any handmade cards since the pandemic and frankly speaking I'm still not able to make them and one of the reasons is because of my messy room that is still messy. Not a space available on my table to make cards. I have no idea how it got that bad really. Wait.....I forgot I'm a hoarder too. Haha! Of course there are other reasons why it's messy but hoarding is one of the reasons how it got that bad. To clear up all the years of hoarding that I did requires time. I was thinking of giving away some of the stuff that I have but not as they are now but instead in the form of a handmade craft. Make something with them and give them away. That's the plan. Sounds like a great plan but executing it again, takes time. 

So I thought of something fast and easy to do, that won't take so much of my time and energy, which I don't have a lot nowadays. One of the ideas I had was to make crochet face masks extenders. It's something I've been wanting to do since it became a trend to wear them with the face masks so that our ears won't hurt so much. I need them for myself as well because I wear a scarf and it's so hard to wear it without the extenders. I did make one with fabric before but I also wanted to crochet them. I've seen a lot of people wearing them in town when I go out grocery shopping and they are beautiful compared to the fabric ones that I made. I'm not at all great at crochet though. I'm still a beginner, still lots to learn and I think that making these crochet face masks extenders is a great way to practice crochet. It's a small project and in just a few minutes, it's done. I was able to make quite a lot of them this month in different colours but mostly they are made using the same type of yarn because this type of yarn has a clean finish. I love how they turned out.


When I first started to crochet the mask extenders, I was super ambitious! LOL! I tried making the complicated patterns like the photos above instead of the simple ones. I should have tried the simple ones first! There's more patterns that I made but I haven't the time to take all the photos yet. Will try to upload them here later once I have added the buttons on them. I've made a lot but they are without buttons. Still searching for suitable buttons for them. In the beginning I did try to make crochet buttons as you can see from the photos above but I think I prefer buttons that are not crochet. Plastic or wood would be nice.


I got really excited making mask extenders with simple patterns like the photo above. I made lots of them in different colours, so now I'm in the process of finding suitable buttons for them. Searched high and low for buttons that are available in my craft room. I found some buttons that were given to me by fellow crafters, friends and some were bought some time ago. So like I said, I wanted to make something with the things I already have in my craft room. I don't want to go out and buy some more craft materials because then it would defeat the purpose or spoil the original plan which is to clear my craft room. 


THIS GIVEAWAY IS FOR MALAYSIANS ONLY. 
Yes, I'm so sorry! These crochet face mask extenders will only be given away to those living in Malaysia. I am not able to make a lot of them for everybody around the world. So I'm focusing on giving them for those in need from Malaysia.

So for those who are interested to own my humble crochet face mask extenders, do contact me at the email address here ---> inaabdul_21@yahoo.com , just write me your full name and address and contact number and I will be happy to post them to you. The extenders are free of course, so you just need to pay for the cost of the postage because unfortunately I can't afford to pay for that. I'm so sorry about that. :( Wish I could afford though. Thank you for reading this post, do share it with anyone you know who would be interested to get some free crochet face mask extenders, thanks again!!

Blue weaved scarf


Hello everyone!

Hope everyone is doing well even though we are all going through a very rough time this year. Covid  19 definitely has changed me a lot these past few months. I've been feeling really down and have not been my usual self. I really miss crafting but I just couldn't bring myself to create anything new for the past 3, 4 months.

I've been keeping myself busy growing vegetables in my garden at home instead of crafting. It seems to be a big trend around the world these days to grow your own food and I just couldn't help myself to do the same. It's good therapy as well. Since I can't go out as much as I like anymore, staying at home and spending time in the garden in the morning seems like a good idea in the beginning. Honestly I love it till now. But it did occurred to me that I needed to get back to crafting as well. I received some lovely gifts from a dear friend some time ago on my birthday this year and those gifts somehow gave me some motivation to create something again.

I immediately got into the mood to do something creative but I had to clean up my room first because it was so dusty and messy. I've neglected it for the past few months. When I was cleaning up the mess, I stumbled upon a weaving project that I started way back in 2018. At the time I was so addicted to knitting, crochet and weaving. I did make a small weaved scarf at the time too using the same method. Then I got over ambitious and wanted to make a bigger and longer scarf. Unfortunately I didn't get to complete it back then because I was so busy doing so many things at the same time. So I decided to finish what I started. I still have one more knitting project that I started in 2018 left to complete. Not sure when I can  get that one done though. But I'm glad that I manage to complete the blue weaved scarf once and for all.

To be honest, I don't think I will be weaving another scarf anytime soon. It's so difficult to do plus it takes so much of space in my craft room. So from now on wards I would just do crochet or knitting with a loom. If I ever wanted to weave again, it will only be in smaller sizes using a small loom that I bought some time ago. That would be exciting to try. I've always love trying out new tools.

This blue weaved scarf did not come out as nice as I expected but it's ok, as I am a beginner. I'm always glad that I did try it as it was a good experience. Anything new to try is always good for the brain. I love to challenge myself. There's definitely some flaws on the scarf which you may not be able to see clearly but I know where it is. So it's definitely not for sale, it's just for my own personal use. Weaving is very time consuming and needs a lot of patience. I'm just so relieved that it's done, haha!


I DIY the loom that was used to make the blue weaved scarf using a long thick cardboard. It's actually two long cardboards glued together to make it really thick. I also used a lot of pearlescent plastic tip pins. Since I wanted to make a really long scarf, I had to use and weave on both sides of the cardboard. So that was not easy to do. If it was just one sided, it would have been much easier.

After all the weaving was done, I finished off the sides of the scarf using a crochet hook. That would be my favourite thing to do as it is the easiest, LOL! Finishing off the sides and braiding the ends of the scarf was fun. I was happy with the outcome. 

Now that this blue scarf is done I can continue to complete other unfinished projects that I neglected some time ago. I hope I won't lose the motivation to craft again. I do miss it a lot. Thank you to all who still stick by me even though I went missing for a long time. I appreciate it a lot. Lots of love to you 😍❤️.


New handmade slotted quilling tool design


Hello everyone! 
I'm excited today to share with you something that I've been working on lately. I haven't made a handmade slotted quilling tool for quite sometime now so it's always fun, exciting and a good challenge to do it again ☺❤.

Why make a new design you may ask? Well, I don't like to make the old design anymore because it's a bit pricey to prepare the materials plus it's difficult to make as well. I wanted to make a slotted quilling tool that is more affordable for everyone and not too pricey for me to make as well. 

To be honest, I didn't plan to make slotted quilling tools anymore but lately I've been getting orders for them so I had to think of making something new for those who requested them. 

Alhamdulillah today I get to share the new handmade slotted quilling tool that I made. No more rainbow colours on the tool like before, instead it's a more geometric pattern that I found that has colours which match the gold colour slot. I love it! 

I didn't make a lot of the tools, no mass production of it. I only make them for those who are really interested in handmade tools.  I don't have a lot of time to spare to make a lot of them anyways as I am busy with other work. But if there is a lot of orders for them, I would definitely need a long time to produce them. So it's only those who appreciate handmade craft and willing to wait. ❤☺


How to make multicoloured square vortex - Quilling tutorial


Hello everyone!
I know many of you are still having problems quilling multicoloured square vortex shapes. So did I years ago! LOL! On a good day I could make lots of them, but there are times when it really tests my patience and hurts my fingers! haha!

I have to say that I thought of a new way of making the multicoloured square vortex shapes coincidentally as I was doing quilling. Been busy with other stuff lately that I have stopped quilling for  a few weeks. But when I started quilling again, the idea came to mind, alhamdulillah. Such a blessing because I love the multicoloured square vortex shapes a lot. But making them can be a burden to me and to some people and I'm so happy that it's no more the case now. I can now make as many of them as I like. I'm super happy about that. 

In the video tutorial that I made back in 2016, I made the multicoloured square vortex shapes using 3mm shredded papers and I used the slotted quilling tool. In my new video tutorial, I used clean cut 5mm quilling paper that I cut by hand piece by piece and I used a flea comb instead as a tool. So it's totally different from what I did years ago. 

A lot of people have been asking me about the type of paper I used to make the multicoloured square vortex. Well, I have stated in the video tutorial the type of paper I used and most of the time it has always been A4 80gsm printing paper. I don't buy standard quilling papers for my quilling craft. I prefer to make them myself. Either I cut them piece by piece or use the manual paper shredder or the pasta machine. 

Please watch the new video and see how easy it is to make the square vortex shapes. You'll be surprised! 


QUILLING LOVE BIRDS - QUILLING TUTORIAL


Hello everyone!
I'm happy to share with you another quilling tutorial today. Been wanting to do this tutorial for years now but never got around to doing it till now. I'm so glad I finally get to do it this year! I've gotten so many requests for this tutorial from subscribers on YouTube and from followers on Instagram. 

If you are new to my blog you probably didn't know that I've done quilling love birds before. Way back in 2010 to be exact. Back then, the design was simpler. I did improved on it and made more as years go by. The last time I made one was in 2015 if I'm not mistaken. You can view the old posts on my quilled birds by clicking HERE.

This year I wanted to improve on it even more by making it 3D and did some small changes on the shape. I planned on using the love birds as decoration on my handmade card soon. Will reveal the completed card here when it's done. Still working on the little details.

Do check out the quilling video tutorial below and make your own version of the love birds today! Thank you for watching! :)


Featured in All Things Paper's blog!


Hello everyone!
I'm super duper excited to share with everyone here about this feature! I couldn't believe it at first but it's true! One of my recent YouTube video was chosen to be featured at Ann Martin's, All Things Paper's blog as one of the 10 MOST FAVOURITE QUILLING VIDEOS!! How cool is that?? The link is below, do check it out!

https://www.allthingspaper.net/2020/03/how-to-quill-10-favorite-quilling-videos.html?m=1

The video that was featured was the one about how I cut and embossed paper using the pasta machine. I never thought that one day I would get myself a pasta machine to cut paper, LOL! It's just so funny! I would never use it to make pasta though. I'm not that interested in that. All I care about is paper.

Special thanks to Ann Martin for choosing me to be part of this feature. I'm truly honored to be listed. All the quilling artists who were featured with me are special in their own way but some of them are those whom I'm a huge fan of! 

So do check out the blogpost and see it for yourself especially if you are a quilling lover. You will definitely learn something new from those videos featured there :).

How to make the 235 quilling flower


Hello everyone!!
New video tutorial for everyone! Been so long since I last made one, I wish I have the energy to do more. Truly. 

You must be wondering why I name the flower 235 right? Well I did explain why in the video tutorial, but what the heck, I'll tell you now why I chose that name. It's simply because I used 2mm, 3mm and 5mm quilling papers to make that flower. LOL! Yes I know it's a little funny but nevermind I don't care. I made it and I'll name it whatever I want hahaha!

You'll get to learn a trick or two by watching the video as I go through step by step on how to make the flower. It's time consuming to make just one flower but the results is awesome. Do check out the video tutorial below and make lots of 235 quilling flowers today! Thank you!

Hello Sweetheart - Quilling + String art card


Hello again everyone!
Happy to share another one of my quilling + string art card series today.  I still have a few more in progress with different colour combinations and arrangements.  This card is filled with pink colours in the background. There's those pink polka dots layered on top of a dark pink card stock. Then there's pink flowers, pink butterflies and pink sentiments! 

I think this is my first time trying out this colour palette. The brown string art circle match well with pink, yellow and green. I wish I had a different type of green paper for this combo but I didn't have a lot of choice for the green paper and  so the light green seemed to go well with the combo. Make do of what I have! ;)

I really really love that Hello Sweetheart die from In Love Arts Shop! It's perfect! With tiny little hearts and all together with the sentiment! Cool! I die cut the dark pink sentiment 3 times and layered them to give it a special raised effect. Loved the results. I don't have anymore problems cutting them even though the design is a bit intricate. 

Another first for me is making that big 3 layer pink and beige flower. Now that I can cut 2mm, 3mm and 5mm paper on my own, I can now experiment more on combining them in a single flower. Just a simple one and I loved it. D Will definitely do more with different techniques.

The whole idea here is to try new things, and be creative, that's  what ignites the fire within to craft more. I personally love to challenge myself every time so that I will always have the drive. 


For Someone Special - Quilling + String Art card


Hello everyone!
I'm back with another quilling handmade card! After playing around and experimenting a lot with the 2mm and 5mm quilling papers that I made using the pasta machine, I finally assembled them all on a piece of card. 

I had sewn a Spirelli string art on a piece of a circle card and added matching seed beads that matched the quilling flowers and leaves. This type of design can be made in different colour combinations. 

This is my first time using the polka dot stencil to make the background of the card. I really love how it turned out. The Tim Holtz's Peacock Feathers distress ink that I used to ink the polka dots on the metallic card really suits the base of the card and the quilling arrangement.

It's a simple card design and not too crowded and bulky. I was happy to be able to use the die cuts that I got from In Love Arts Shop again as sentiments for the card. It is one of my favourite die cut sentiments from them. I'll be using more of it in future because it's suitable for all sorts of occasions. :)


Making quilling papers with the pasta machine - REVIEW


Hello everyone!
Once again I'm experimenting with a new tool that could help me with my quilling crafting. This is something that I've been wanting to try since last year. I saw a few videos on YouTube that shared how we can make quilling papers using a pasta machine or a pasta maker, whatever you'd like to call it. When I first saw the video I was really shocked to see how easy it was for them to cut an A4 paper to make quilling papers of different sizes with the machine. It was really exciting to see the demo and I wished I could do the same.

I only have a manual paper shredder and it only cuts 3mm paper strips. If I wanted other sizes, I would have to cut the paper with a craft knife. I do wish that there is a machine that could cut other sizes as well. That's why I wanted to try the pasta machine. So I went to searched for it in town and found a cheap one that I could try at home.  I wish there was a better quality one here but I couldn't find one. In this post, I just want to do a little review on the product and share with everyone my experience using it. 

In the beginning, I did have problems using the pasta machine as it didn't cut well and the paper strips didn't come out straight. The edges were not clean cut either. So I was a little frustrated. But I didn't give up and tried to figure out what I did wrong. After numerous tries and lots of spoiled papers, I managed to cut the paper straight enough and less paper went in the dust bin. I needed to be patient went running the paper through the machine, must slowly crank the handle. I cut the A4 paper in half and run it through one piece at a time. The best weight of paper to use is 80gsm. The thickest I've tried with the machine is 120gsm.


The pasta machine that I bought could only cut 2mm and 5mm paper strips. I was happy about that especially about the 2mm strips because I've never used a paper strip that small before. I'm used to 5mm already, and I liked it too.

As you can see from the photos above, I really love making those leaves using the 2mm strips. I could also make it look like a 3D leaf and yet it doesn't look so bulky. That's what I love about it! Awesome!


I also made small little flowers with the 2mm strips. I really love them! They will compliment the bigger flowers really well. I've always wanted to have different quilling paper sizes for different purposes and now I can make it happen because of this machine.


I cut the 5mm paper strips and made bigger sized flowers with them. It's nice to make flowers with different size strips. I'm so used to using 3mm paper strips for so many years so it was nice to be able to cut a lot of 5mm strips at one go and work with them.


Another thing that you can do with the pasta machine is use it to emboss your cards or papers. But the emboss is not that deep which I actually like because sometimes there are times when I use the Big Shot machine to emboss, it pressed the embossing folders too hard and tears the paper. So the pasta machine does not tear the paper at all. Love it!

All in all, I don't regret buying this machine but I don't necessarily recommend it to anyone especially if you don't have the patience and don't like rough edges on the paper strips. The machine has helped me cut the 2mm  and 5mm strips that I wanted even though it does have some rough edges. I really don't mind it that much because I'm used to the rough edges already. I've been making quilling cards using shredded quilling papers with rough edges for 10 years now and it has not stopped me from being creative. Hope to make more interesting quilling shapes with the new quilling papers!

Do check out the video below to see how I use the pasta machine. Thank you!

Ramadan Kareem card


Hello everyone!
I know it's a bit too early to make Ramadan cards, but why not right? Better early than late!  This card was the last one I made for my craft product review video. I picked one of the few Ramadan Kareem metal cutting dies from In Love Arts Shop, and came up with this simple straight forward design. It's nice to make simple card designs once in a while.


So, here is the Ramadan Kareem metal cutting dies. There are a few dies in this set. That's why with just this set, you can straight away make a complete card with them. I just added more tiny stars and punched the corners with a corner craft punch and it's done. Just think of a suitable colour combination, arrange them in a nice angle, and that's about it!  This is probably the fastest cards I completed compared to the other 4 cards I did for the craft product review. LOL! :D

The sentiments are in Arabic and it says Ramadan Kareem. It's super cool to see Arabic wording dies because it's not something I commonly see or sold here. This is actually the first time I've seen anything like this, seriously. So when I found out that they are selling this, I immediately grabbed the opportunity to own one.

I do plan to make more of this card when I have some free time and explore what other designs I can do with the dies. There's so many things we can do with them. I don't think I've ever sent anyone a Ramadan Kareem card before so it's great that I can do so this year. We're always so focused on Eid cards, but we rarely do much when it comes to Ramadan cards. We just focus on the 'ibadah' more during the holy month. Which is also a good thing. :)

In Love Arts Shop is selling other Ramadan Kareem dies and clear stamps at their website and I plan to collect them all! One by one till I own all the designs. I can't have them all at once so I just have to be patient in collecting them :D.


I'm So Grateful For You - Die cut card


Hello everyone!
Today I want to share with you one of the 5 handmade cards that I made for the craft products review which I did this month on YouTube. This design is mainly made using die cuts! Kinda rare for me to just use die cuts as decorations. Usually I would mix it with quilling or other types of decorations. But this one is almost 99.99% made of die cuts. 


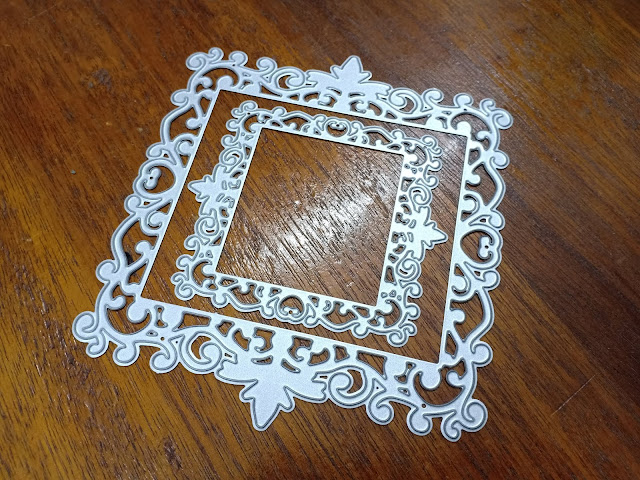
The floral frame die cuts that I used for the background for the card is made using dies that I received from In Love Arts Shop. Love it so much. First time ever for me to try to blending intricate die cuts with distress ink!! I really love the effect. The die cut looks like it's blended into the card itself since I used a red distress ink to match the colour of the card. 

The whole colour scheme and combinations are based on the die cut birds and roses. I really love them a lot. Too bad the shop where I bought them from don't sell them anymore. I can't even remember what year I bought them. Anyways, they are no longer in stock there. So I guess this card is a limited edition, LOL! Coz I can't make another copy of it.

The stamped sentiment is also from the same clear stamp set I got from In Love Arts Shop. I hope they will stock up more clear stamps that has handwritten sentiment designs like this. They are so pretty.

This card was done in just a few hours. That's why die cuts are great. It saves us time when we need to make a card in a hurry. When you already have the idea in your mind, you can make a card faster with the right materials. Easy to assemble and look fancy at the same time. ;).


Featured Post

How to make two tone tear drop shape quilling flowers

We are coming close to mid February and I'm blogging about something that I did last January! LOL! It's been a month sin...