How to make quilling vortex coils with a slotted quilling tool


Sometime ago this month, I came to learn how to make vortex coils from a short video tutorial that I saw at my dear friend's Miyyah@Kertas's Instagram. I got so hooked up with it that I practiced making the coils a lot. The more I make them, the more I got hooked. The first try was not as nice and I was not 100 % satisfied with the results, but eventually I got the hang of it. I was quite happy with the outcome but I find it was really hard to make them. 

First of all, since my hands are pretty shaky most of the time, it was hard to hold the coils and make sure I didn't drop it while coiling it. My fingers hurt a lot in the process of making the coils because the process of rolling and pinching the coil really hurts especially when I used thick paper strips instead of thin ones. Not sure how other people felt when they make them, but I felt that way.

One day a customer of mine contacted me and expressed her frustrations in her inability to successfully make the vortex coils due to health issues she has with her hands. She only has one hand that is fully functioning and the other one is not functioning as well as the other. So, she asked me to help her out by designing  a tool that she can use to help her make the vortex coils. I was stunned! I had no idea how to do that since I myself just used my bare hands to make them. I felt so bad for her and really thought hard that day on how to solve her problem. She's a real fighter and she never gave up trying even though it was tough for her to do it. Her determination pushed me to find solutions. Then it occurred to me that perhaps my handmade slotted quilling tool could do the trick. I immediately tried making the vortex coils with the tool and to my disbelief, it worked!!! Bingo!

I reached my digital camera and started making the video after testing the method a few times. After I was certain that the method works, I just had to do the tutorial. I'm so happy that not only I benefited from the method as I no longer hurt my fingers making them now, I also helped others to make them. That made me really happy. One thing though, just after I uploaded the video tutorial, I got a better idea on how to make them! LOL!! So I made another video on vortex coils today and this new method helps me make vortex coils faster and easier too!

You can use any type of quilling paper you like to make vortex coils, thin or thick ones, shredded or smooth store bought quilling papers. I have tried them all and the method works for all types.

I will be making another video tutorial to show how to make a square vortex coil soon. Do be on the look out for that one soon! :)

Here is my vortex coils video tutorial that I made so do give it a try! Thank you so much for watching! :)


A birthday wish

HB128

This little project was something that came to mind last year. I've always wanted to do something like this someday and I'm happy that I can do it this year. I did mentioned in my previous post that I wanted to write more sentiments on my handmade cards. And here for the first time, I used a watercolour brush to write the sentiments. It was really thrilling, exhausting and worth every sweat and ache. I had to practice writing them first before I could actually write them on the die cut labels. Practiced writing all the alphabets from A to Z. So practiced and practiced I did till my hand ached all over. 

I see a lot of people doing brush lettering on Instagram and on YouTube and they all make it look so easy. The words just flows easily with the brush like no sweat at all. I guess it looks that way when you are already an expert and have been doing it for years. For a beginner like me, well, it was not as easy. It can be a little frustrating especially since I wanted to be able to write it as fast as I could. But I realised that it really does takes a lot of time to do it. A letter at a time.


For the sentiments on this card, I just used the smallest watercolour brush that I could find at the art supply store to write the sentiments as it is for a small handmade card, so the smaller it is the better. I had a hard time deciding how to position the words on the label. At first I tried writing "Happy Birthday" but it didn't worked out as nice as I wanted it to be, so I ended up writing "A birthday wish" instead. And I was really happy with that. 


At first I had the labels rectangular in shape like the photo above but decided to cut them up using the oval die cut label pattern because I thought it suited the sentiments better. Therefore I also had to change the design of the flower arrangement a little. Not much.


Doing watercolour designs on my handmade cards is something that I have always wanted to do. For this card, I decided to start small and just do a simple flower decoration around the label. Nothing complicated, really simple and sweet. Something to get me started and motivated to do more for the other cards in future. I really enjoyed using the water brush to paint the flower arrangement. It was really fun and easy. I love using the water brush as it was not too runny, and the water flowed a little at a time, so it was easy to control the water flow.

Since the flowers and leaves that I wanted to paint on the label are pretty small, I thought it would be better to use watercolour pencils instead of the using the ones from the tube. What I did was I wet the watercolour pencils with the water brush and coloured the flowers and leaves with it. I only needed a little colour for all the flowers and leaves. So the water colour pencils worked out fine as I was able to control the amount of colour I needed to use. 


I really love this chain stitch I did for this card. This is the first time for me to do it on paper. I've done so on fabric before but never on paper in this manner. Sewing a chain stitch on fabric is different from how I've sewn it on paper. I think the technique I used for the paper is a lot easier and perhaps can be used for sewing on fabric as well. Those who have done chain stitch on fabric before would understand what I'm trying to say here. I hope to be able to do a video tutorial on how to hand sew this chain stitch on paper this year. And perhaps do a simple running stitch tutorial as well while I'm at it. Will see how it goes. Time is always an issue with me. I need more of it! :)

I love how the card turned out in the end. I am planning on sending these cards to a few people this year for their birthday of course. Hope they like it! ;)


Hello 2016!


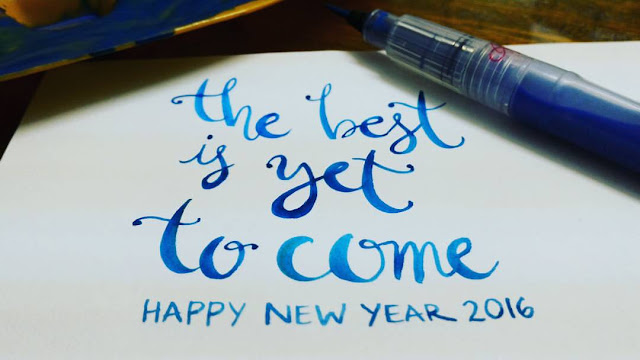
A brand new day, a brand new year, a brand new, new year's resolution perhaps??? hahahhaa.....I'm not going to make a list of new year's resolutions anymore. I'm too old for that. I just do what I can, when I can haha!! But I do have a new love. And that is calligraphy!

I fell deeply in love with it last December....and whenever I have the time to spare, I would spend it on practicing writing either with pencil, pen, water brush or just with a water colour brush. I just got my water brush yesterday and I've been spending time all day writing with it. Ok ok......not all day, perhaps for a good few hours, since I do need time to do other things like to eat, do laundry, clean the house and a million other things, LOL! If only I have a live in help to do all the other things for me, then I can play all day in my craft room. Wouldn't that be simply divine :).

I just wanted to share the brush calligraphy that I did today with my new water brush. And a video of me writing that "Hello 2016" with much fear of making mistakes. Haha! I think I took about 10 videos of it before I got it right. Doing a video can be really exhausting! Only those who have done so would understand the pain of making a craft video. It ain't easy, I tell ya! Even if it is merely a minute. Haha!


I do hope to be able to learn more on calligraphy this year and somehow incorporate it more in my artwork, especially for my handmade cards. It would be awesome if I could. So much to learn and discover. Exciting things to explore. I wish all of us the best for this new year. May we learn and become the best that we can be and more. :)


Featured Post

How to make two tone tear drop shape quilling flowers

We are coming close to mid February and I'm blogging about something that I did last January! LOL! It's been a month sin...