Selamat Hari Lahir Mak

HB127

Looking back, I have been making a lot of handmade card in a box for December. And this is the last card in a box design that I made for 2015. I found a lovely English roses pattern paper and instantly got an idea of using it as the background for the card, plus for the pop up.

I cut out the roses and other small flowers from the pattern paper and glued them all on a thicker paper so that they can be used as pop ups. It's a lot of work but I love the results.

The sentiments were handwritten. I find it so enjoyable and fun to be able to write the sentiments myself instead of printing them. It's a good change. At least now, everything is handmade. From the card to the wording to the decorations.....all handmade.

Do check out the video below of the card design. Thank you!

A card in a box for Aisyah Aqeelah

AO061

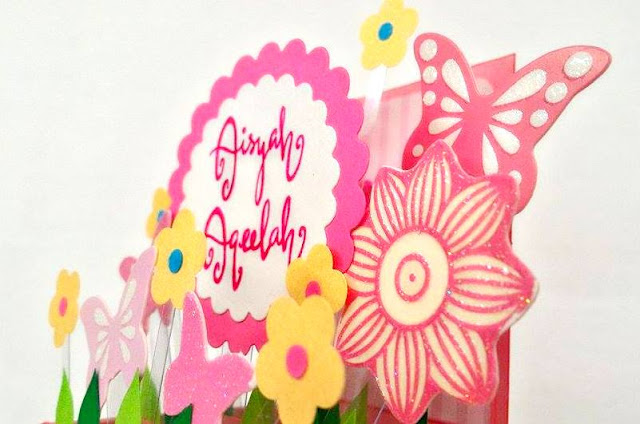
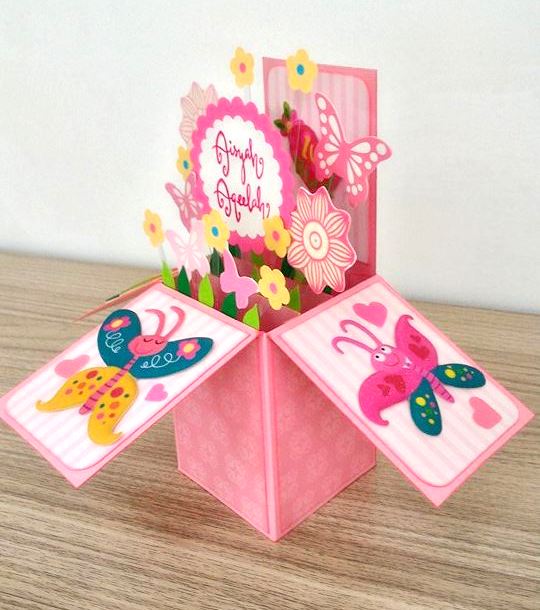
After I did a card for my customer's boss, I was asked to make another card in a box for my customer's little daughter.  It seems that her little daughter saw the photo of the card I made for her boss and wanted a similar card with her name on it. Of course it had to be in pink because it's her favourite colour. It didn't matter how the design would be, as long as there is lots and lots of pink all over the card. Haha! That shouldn't be a problem  for me. Again I was given full freedom to design it my way and I had only one day to complete it! Ack!!!


Ok, for this card design, I was lucky enough to stumble upon some card in a box set or kit at Mr Diy some time ago this month and they had so many cute and lovely stickers and embellishments that came together with the kit. So I thought this would be suitable to use for her daughter's request as there was one card in box that was pink all over with lots of pink embellishments. But I didn't use all of them though, because not all of the embellishments were suitable for little kids and so I mix and match with other embellishments that I had in my collection to create a design that would be suitable for a little girl. Something that little girls would appreciate.

I'm glad I managed to get it done on time. A simple design with her name handwritten on it just the way she wanted it. No particular occasion for the card, it was just a simple card in a box that now belongs to her. Something that she will cherish for a very long time hopefully. Hehehehe!

Do check out the video below of the card above. Thank you!!


Happy Birthday Zamzure!

 
HB126

Hello everyone! Although it's a bit late uploading this card design here, since the card was done way before December 24th, I still am excited to share about it with you. I think I've done in the past a handmade card that has a combination of gold, bronze and black but never for a handmade card in a box.

I wanted to do a different combination of colours in the beginning according to the preference of colours my customer's boss was into but I just had to go with my instincts on this design and choose the gold, bronze and black instead. One thing do I love about this combination is how fancy it would look once it's done because of those rich colours.

Decorating a handmade card for a guy is never a simple task for me. I am better with designing cards for women. And as usual, the only reason why I accepted the task was because my customer gave me 100% freedom to design it anyway I like it as long as it looks good. It's easier for me to design when there are no restrictions.

I love using stripes as part of the design. I've done that for my other two card in a box designs before. Somehow they seemed right. And since it's a design for a guy, it's even more perfect for the design. The bronze coloured frames are probably my favourite part of the card. I made the frames myself. When I first made the frames, they were never intended for this card. I was thinking of some other use for it for a different type of card but since I needed something bronze in colour as decorations, these bronze frames came in handy at the right time.


As you can see, I wrote the sentiments myself, and I even wrote the wishes on the back of the card for my customer so that she didn't have to write them out herself. She wanted the writing to look good, as this card was made for her boss. I hope I did good on that. I'm still learning about calligraphy and how to write with different types of medium. Hopefully I'll get better at it, so that I can use this technique on all of my handmade cards. That would be awesome!

Do check out my video of the handmade card in a box below. Thank you!

Dusty blue and rose anniversary card

AC014

This is the third time easel card that I mentioned about in my previous post. I used pattern papers from the same package that I bought to make my second easel card. The colours of the papers from that package are mostly pastel and more subdued. Very light shade of blues and rose and some soft cream colours. I rarely get to work with such colours. Most of the time, the colours I used are quite bright. So it's nice to use pastels for a change once in a while.

In a quick glance, this anniversary card looks similar to the birthday card I made previously. The design of the roses and how I arranged them on the card are similar. The differences are minimal.

I started using the die cut rose pattern for the birthday card and I just couldn't stop using them for this anniversary card too. They are just so easy to make and a great way to decorate a card when you have no idea what to embellish the card with. It's an easy fix.

I'm getting used to making easel cards now and I'm positively sure that I'll make more of them next year. Do check out the video of the card below and see how it looks like when I open it up and make it stand on display :).


Dusty pink roses easel card

HB125

Hello everyone! I have not been active here as much as I should and I seriously have to get back in action as often as I can here from now on wards otherwise I would be in trouble in updating what I've been up to for the past few weeks. A lot has happened since my last post and I've been busy making cards and quilling sets. So lots of blogging to do soon before the year ends!
 
This is actually my second easel card that I made in November and there is another one I made in November too which has a similar design but with different occasion. One is a birthday card and the other is an anniversary card. Both have different colours but almost the same layout though. Oh well, you'll see what I mean soon enough once I've blogged about it :).

I was thinking of new ways to decorate this card and I remembered the die cut rose pattern I bought years ago. I used to hate using this die cut rose pattern because I actually thought it was not pretty when rolled up. Not sure why I changed my mind this time around. I kinda love it now! Haha! Yes, I guess people do change their minds after some time. We just never know how we would feel about certain things sometimes. One minute we hate it, and the next minute we might just love it.

I used a few pattern papers that I was never going to use as a background layout for my handmade cards to make the quilled roses. The colours of the pattern papers for the roses somehow fits nicely with the rest of the colours of papers I picked for the card. So no pattern paper will ever be wasted from now on wards! Yay!!

This is what it looks like inside the card when you open it...... :).


I made two of this design so far for two special ladies. I've known them since I was little and they are fans of my handmade cards. So making this card for them was really great because they really adore handcrafted cards so much. 

Do check out the video of the card below. Thank you so much for watching! ;)


Happy 2nd Anniversary tri-shutter card

AC013

I haven't made a new tri-shutter card design for a long time now. I think the last time I made one was in 2013. This new one has two photo frames attached to it for me to insert a couple of photos inside it. Actually, the whole idea was thought out because I wanted to make it easy for me to make the cards in advance and let my customers insert their photos in the frames themselves.

But in this case, my customer had posted the photos to me and asked me to do it for her. Perhaps in future, I'll let them do it themselves. I made the photo frames easy to insert photos in and out of it. I'm already having lots of ideas coming out for future card designs with photo frames attached to them. I love it when my customers get involved in the process as well. They can decide on their own which photos to put wherever they like on the card.

The colours for this card was decided by my customer. She wanted the pink and green theme. The first thing that came to my mind was these pattern papers I had and how I could pair them together with those sweet pink paper roses I made using my die cut rose pattern. I'm still not bored using those die cuts yet! Haha!! So perhaps you'll see more of them soon.

The Happy Anniversary sentiments in front of the card were hand stamped using clear alphabet stamps I got from Popular Bookstore. I just adore them to bits! I wish they would sell the same type of clear stamp font in a smaller size though. But this big one was really nice to work with and stamped really well on paper too. They were such a good bargain. I drew a pencil line across the paper before stamping the letters one by one. It was challenging but fun to do it. :)

Those sparkly stones were added one by one on the diamond checkered pattern paper too. I don't know why I just love doing that on this type of pattern paper! Somehow it gives the paper some added value and makes it look more interesting. Otherwise, it would be a bit dull. Do check out the video of the card below and view it in motion :). Thank you!


My first easel card

 AC012

Gosh.....I am way behind schedule when it comes to updating my blog lately. I have so many cards waiting in line to be uploaded and blogged about. Things have been really chaotic around here so much so that I'm forgetting a lot of things including not taking a video of my first easel card! I totally forgot! Arrrggghh! I hate it when things like this happens. OH WHAT TO DO! The card has been sent out last month and the occasion is all over. If only I could turn back time.

Yes, it was my first easel card. I took a risk doing it, with permission from my customer, as he only wanted a simple anniversary card for his wife but me being someone who likes challenges, I opted to do something different from the original design that I've done before. He wanted this card HERE, just click on it and you will see what it looks like. It's similar to the quilling birds that I did for this easel card. The old design was done in 2012. So long ago and I've learned so much since then, so I wanted to apply new techniques on this new design. I just don't see myself doing certain techniques anymore. Hence the new look. :)

I'm just glad that my customer let me do whatever I wanted. He's happy, I'm happy. That's all that matters! I get to try and do something new and I loved it. I never thought that I would like making the easel card but I did. Sometimes, there are certain designs that would look better using this type of card fold. So I'm glad that I decided to do it. 


I also had fun sewing beads on the card. I sew them all around the card to make it look like a frame. At first I thought of just sewing the green thread all around but since I wanted to do something different, I thought it would be nice to add those seed beads. I love experimenting and trying out new things. It just makes the experience a little more fun than usual :).


My latest quilling kit for quilling beginners


I think I have changed my quilling kit/set for several times over the years. This latest one is my favourite so far. My most favourite item inside the kit would definitely be my slotted quilling tool. I used quilling papers as decorations inside the tool. All the colours of the rainbow. I love it :).

Another cool item in the quilling kit is of course the small nozzle white glue. The small nozzle makes it easier for us to apply the white glue on quilling paper. Easy to clean and easy to refill the white glue once the bottle is empty.

I'm selling the quilling kit specifically for quilling beginners who are looking for cheap alternatives when buying quilling tools. As we all know, not all of us can afford expensive craft tools and I'm just doing this to help those who are in need. I was one of them and I sure wished someone could provide the cheap alternatives back then. But since there weren't any, I had to resort to buy the expensive ones.

Items in quilling kit:
1 handmade rainbow slotted quilling tool
1 mini circle template
1 small nozzle white glue
4 packs of 80gsm quilling papers (200 pieces altogether)

I am also selling 80gsm quilling papers that I shred myself using the mini paper shredder. The size of the paper is 3mm x 297mm. I have named all the colour of the papers on the photos so that it is easier for you to list down the colours you would like to purchase. Each pack of quilling paper has 50 pieces of quilling paper.


So if you wish to order these items, do email me (Miss Lin) at inaabdul_21@yahoo.com, or you can WhatsApp me at my number 017-6508141.

The actual cost of each quilling set is RM21.00 but I'm selling them at a much lower price which is only RM18.00 a set and each pack of quilling paper only costs RM1.50. Very reasonably priced. Now everyone can quill!! ;)

Do check out this video below of how to keep the quilling papers in order after you have opened up the package. Thanks!


Featured Post

How to make two tone tear drop shape quilling flowers

We are coming close to mid February and I'm blogging about something that I did last January! LOL! It's been a month sin...