
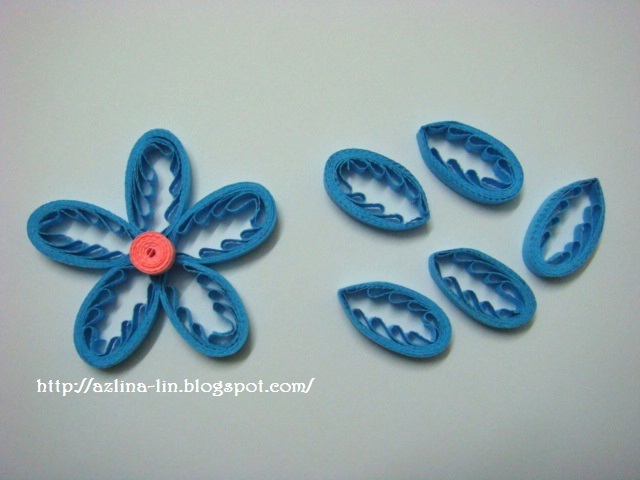
This is another version of the tiny loops flower, but it is made using the quilling comb. As you can see, when using a quilling comb, the flower becomes a bit bigger than the flower made using a hair comb. And the tiny loops inside it becomes a bit bigger as well. So, in other words, the bigger the gap between each pin, the bigger the loops will be.
Here's a video tutorial I made to show you how I made each petal of the tiny loops flower using the quilling comb. :) Check it out!
As you can see from the video, I used only 1 strip of quilling paper to make the tiny loops petal and then wrapped around it half a strip of the quilling paper to secure the shape of the petal.
Once all the petals are made, you can join them together to form a flower. The quilled tight coil is just a sample of how you can decorate the flower to make it look more complete. But of course there are many other ways to decorate the middle part of the flower to make it look beautiful. I'm just showing the simple basics of how you can decorate it :).

The above photo shows how you can make the petal look a little different by pinching both ends of the petal to get the marquise shape petal. If you compare the shape of this petal with the petal made using the hair comb, this petal is a lot slimmer than the one made using the hair comb right? It looks a bit longer and slimmer to me :). So each one is special in it's own way. The quilling comb makes a different effect and so does the hair comb. Up to us to choose which we prefer the best :). So for those who owns a quilling comb, you can also give this technique a try! All the best!!

9 comments:
love these flowers, I make the one with points at each end!!
Paula
I find your work wonderful
Greetings Baukje
Lin..
Thanks for the tutorial..video tutorial lg..
lepas nih blh wat video lain plak..hehe
nt blh wat refer ke sini..
wow you are so quick at it
love the flowers
Paula...I love the ones with pointed ends as well! :)
Thank you so much everyone!! Glad that you all love the tutorial :)
Hello,
thaks for the tutorial :) This was a new technique for me...
If you would like to see what I've done, please visit my blog: http://handmadepaper-sorana.blogspot.com/
Since I am from Romania, the posts are in romanian...but the fotos need no translation. Enjoy!
Hello Sorana...
You're welcome! You have a lovely blog...glad to see you have tried the new technique! Have fun quilling! :)
I have only been quilling for about a month and I am addicted to it. Your videos have been so much help for me. I will be glad when my work turns out as beautiful as yours! Thanks you!!
You are most welcome Gwen! :)
Post a Comment